If you’re looking for a delightful dessert that brings warmth and comfort to your table, you’ve come to the right place. In this guide on how to make the perfect apple crisp: a step-by-step guide, you’ll discover how simple it is to create this classic dish. With its sweet and tart apples paired with a crunchy topping, it’s no wonder why apple crisp has become a beloved favorite among dessert lovers. Whether it’s for a family gathering or just a cozy night in, mastering this recipe will surely impress everyone who gets a taste.
Ingredient Breakdown
Apples
For this recipe, you will need 6 cups of peeled and sliced apples. A mix of tart varieties like Granny Smith and sweet ones like Fuji work best together. This combination provides balanced flavors.
Sugar
Use 3/4 cup of granulated sugar. The sugar not only sweetens the apples but also helps create a syrupy filling when baked. Adjust the amount if you prefer less sweetness.
Cinnamon
One teaspoon of ground cinnamon adds warmth and depth of flavor to your apple filling. It pairs wonderfully with apples and enhances their natural sweetness.
Oats
Incorporate 1 cup of old-fashioned oats into the topping mixture. Oats give the crisp its signature crunch while adding heartiness to each bite.
Flour
You’ll need 1/2 cup of all-purpose flour for the crumbly topping. It binds the ingredients together and creates that desirable texture when baked.
Butter
Use 1/2 cup of unsalted butter, softened at room temperature. Butter contributes richness and moisture to the topping while helping it achieve golden-brown perfection.
Salt
A pinch of salt is essential for balancing flavors in both the filling and topping. It elevates the taste without making the dish salty.
Step By Step Recipe: How to Make the Perfect Apple Crisp: A Step-by-Step Guide
Preheat Your Oven
Begin by preheating your oven to 350°F (175°C). This ensures that your apple crisp bakes evenly from start to finish. An adequately heated oven allows for proper caramelization of sugars in both apples and topping.
Prepare Your Apples
While your oven warms up, peel, core, and slice about six cups of apples into thin wedges. You can use a mixture of tart and sweet varieties for added flavor complexity. Place them in a large mixing bowl as you prepare them.
Mix Apples with Sugar and Cinnamon
In your bowl with sliced apples, add three-quarters cup of granulated sugar along with one teaspoon of ground cinnamon. Toss everything gently until all slices are evenly coated with sugar and spice. This mixture will soften as it bakes.
Create Your Topping Mixture
In another mixing bowl, combine one cup of old-fashioned oats, half a cup of all-purpose flour, half a cup of softened unsalted butter, one teaspoon of cinnamon (optional), and a pinch of salt. Using your hands or a fork, mix until crumbly yet cohesive.
Assemble in Baking Dish
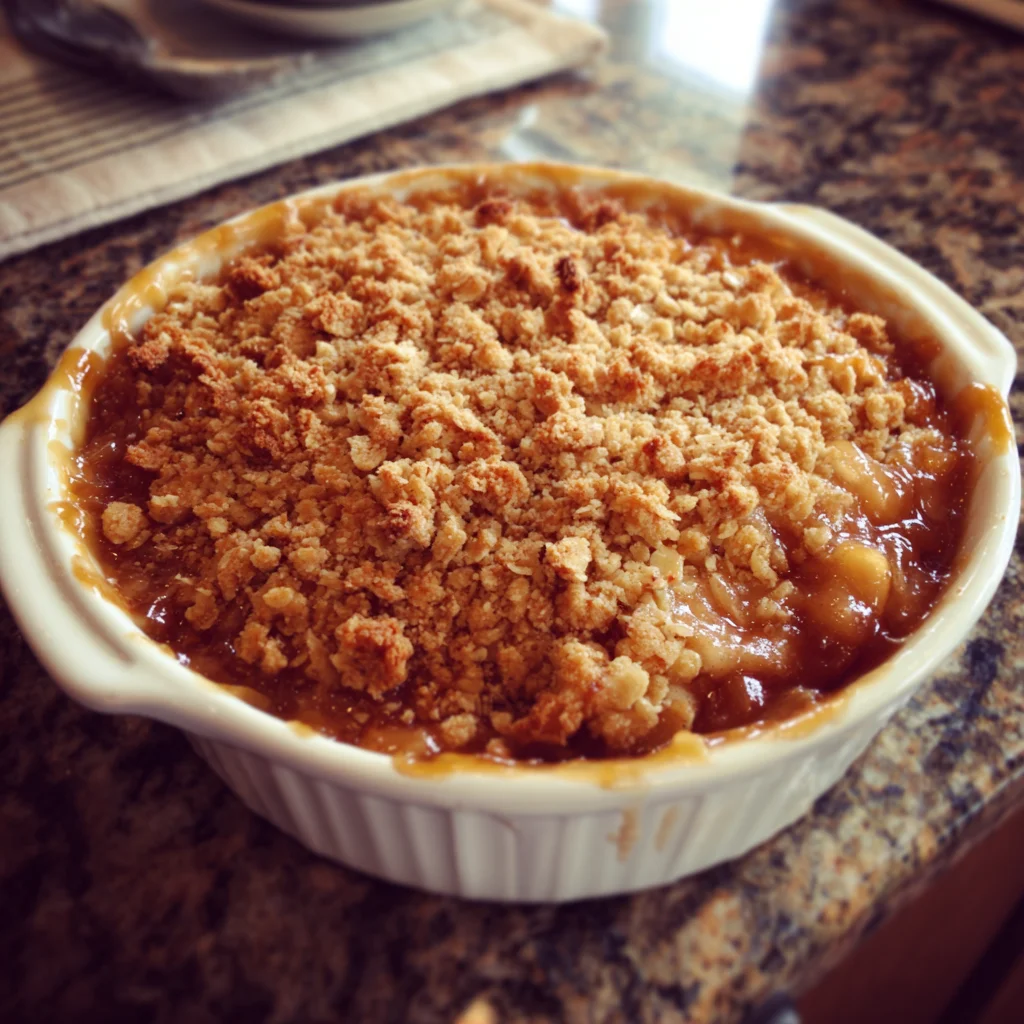
Choose an appropriate baking dish—about 9×13 inches works well—and spread the apple mixture evenly at the bottom. Sprinkle your prepared topping over the apples until they are completely covered. Aim for an even layer to ensure consistent cooking.
Bake Until Golden
Place your assembled dish in the preheated oven and bake for about 40-45 minutes or until both the apples are tender and the topping is golden brown. Keep an eye on it during baking; if it browns too quickly, cover loosely with aluminum foil.
Cool Before Serving
Once baked to perfection, remove your apple crisp from the oven and let it cool for at least 15 minutes before serving. Cooling allows juices to thicken slightly so that each serving holds its shape better when scooped out.
Serving and Storing Tips
Serving Recommendations
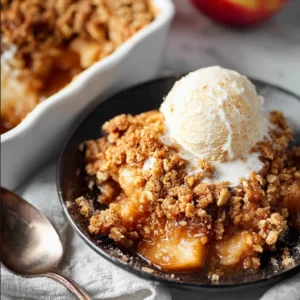
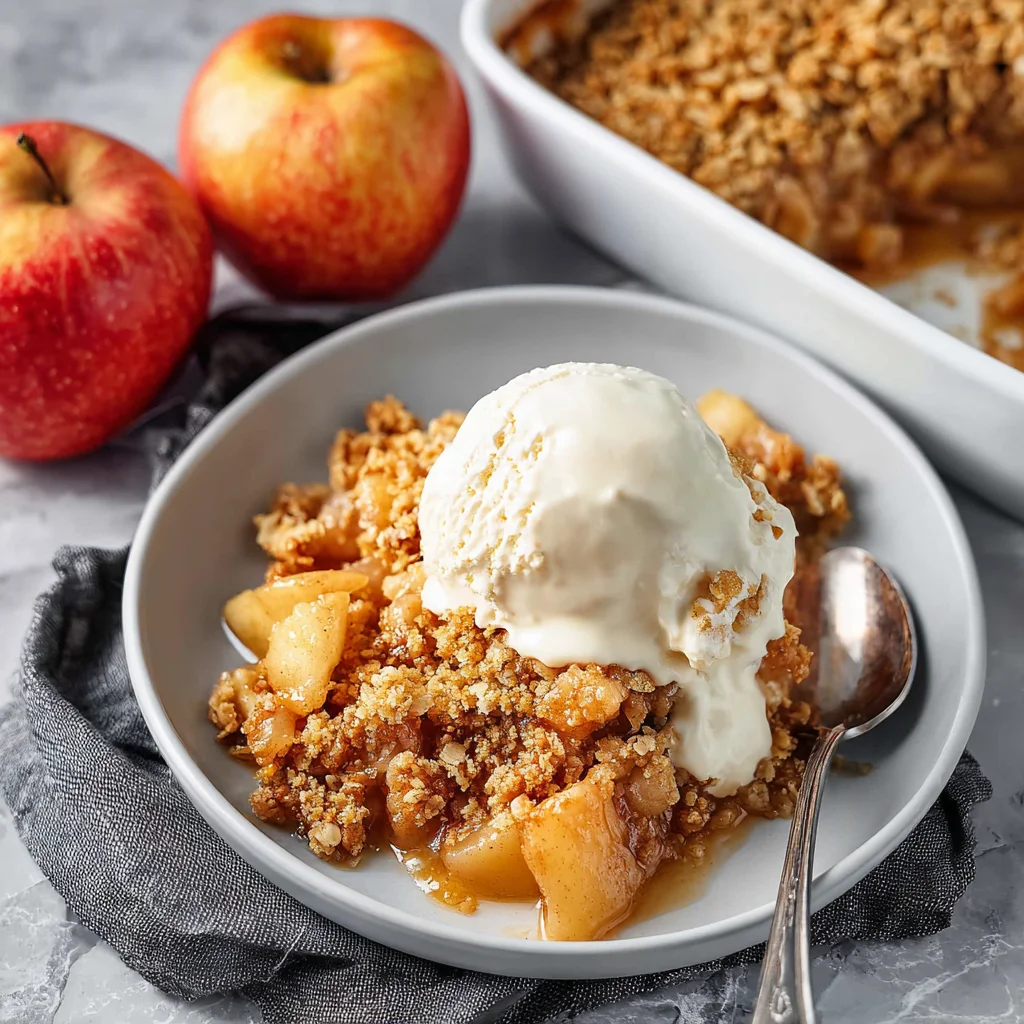
Serve warm portions directly from the baking dish topped with vanilla ice cream or whipped cream for an extra treat. The contrast between hot apple filling and cold ice cream makes every bite memorable!
Storing Leftovers
If you have any leftovers (which is rare!), store them in an airtight container in your refrigerator for up to four days. Reheat individual portions in either an oven or microwave before enjoying again!
Freezing Options
For longer storage solutions, freeze unbaked apple crisp wrapped tightly in plastic wrap followed by aluminum foil. Label clearly; it can last up to three months in freezer storage! When ready to enjoy later, bake straight from frozen but increase cooking time by about 10-15 minutes.
With these clear steps laid out before you on how to make the perfect apple crisp: a step-by-step guide, there’s no reason not to whip up this delectable treat today! Enjoy every delicious bite!
Mistakes to avoid
One common mistake when making apple crisp is using the wrong type of apple. Choose apples that hold their shape and provide a balance of sweetness and tartness, such as Granny Smith or Honeycrisp. Avoid mushy varieties like Red Delicious. Another mistake is not pre-cooking the apples. This step helps soften them and allows the flavors to meld better during baking. Finally, don’t skip the oats in the topping; they add texture and crunch. Ignoring this can result in a soggy crisp rather than a delightful topping.
Overmixing the topping can lead to a dense, heavy crust instead of a light and crumbly one. Mix your dry ingredients with melted butter until just combined for the best results. Additionally, be careful with baking time. Removing the crisp too early may leave the filling undercooked, while overbaking can lead to burnt edges. Keep an eye on your dish towards the end of the suggested baking time.
Another pitfall is skipping the spices, which add depth and warmth to your apple crisp. A pinch of cinnamon or nutmeg can transform ordinary apples into an extraordinary dessert. Lastly, ensure you allow your apple crisp to cool for at least 15 minutes before serving. This cooling time helps set the filling and makes for easier slicing.
Tips and tricks
To achieve a delicious apple crisp, begin by selecting a blend of sweet and tart apples for complex flavor. Combining different varieties enhances taste and texture significantly. Consider adding some lemon juice to your apples as well; it brightens their flavor while preventing browning. Mix this with sugar and spices before placing them in your baking dish for optimal results.
For the topping, aim for a ratio of equal parts flour, oats, and brown sugar to create a balanced mixture that provides both sweetness and texture. Using cold butter will help achieve that coveted crumbly consistency; rub it into your dry mix until it resembles coarse crumbs. If you want an extra crunchiness factor, add chopped nuts such as walnuts or pecans.
Baking at 350°F (180°C) usually works best for apple crisp recipes but keep an eye on it as oven temperatures can vary significantly. You want it to bubble around the edges while achieving that golden-brown topping without burning it. For added flavor, consider drizzling maple syrup over your topping before baking; this caramelizes beautifully during cooking.
Lastly, serve your apple crisp warm with a scoop of vanilla ice cream on top for an irresistible treat! The contrast between warm fruit filling and cold ice cream creates a delightful experience that guests will love.
Suggestions for How to Make the Perfect Apple Crisp: A Step-by-Step Guide
When preparing to make an apple crisp, start by gathering all necessary ingredients first: apples, oats, flour, brown sugar, butter, cinnamon, nutmeg, salt, and optional nuts or sweeteners like maple syrup. Having everything ready simplifies the process significantly and ensures you won’t forget any essential components along the way.
As you peel and slice your apples, remember to remove any seeds or tough core pieces; this ensures every bite is enjoyable without unpleasant surprises! For best results in flavor melding, allow your prepared apples to sit with sugar and spices for about 15 minutes before placing them in your baking dish—this process draws out some juices that enhance overall taste.
When layering ingredients in your baking dish, spread the apple mixture evenly across the bottom before sprinkling on your crumble topping generously—make sure every spot is covered! Bake until you see bubbling juices around the edges; typically 30-40 minutes should suffice depending on oven settings. Finally, let it rest once out of the oven so flavors can settle before indulging!

FAQs
What type of apples are best for making apple crisp?
The best types of apples for making apple crisp include Granny Smith and Honeycrisp due to their balance of sweetness and tartness. These varieties maintain their shape during baking while providing excellent flavor contrast with sugar and spices added to them.
Can I use frozen apples for this recipe?
Yes! You can use frozen apples if fresh ones are unavailable. However, thaw them completely first before using them in your recipe since excess moisture may lead to a soggy filling if not properly drained after defrosting.
How long should I bake my apple crisp?
Typically, bake apple crisp at 350°F (180°C) for about 30-40 minutes until bubbling occurs around edges while producing a golden-brown topping. Adjust timing based on individual oven performance; always check towards end of cooking duration!
Can I make apple crisp ahead of time?
Absolutely! You can prepare both filling and topping separately beforehand—store them in airtight containers in refrigerator up until ready to bake together later on same day or freeze individual components if needed longer-term!
What should I serve with my apple crisp?
Apple crisp pairs wonderfully with vanilla ice cream or whipped cream served alongside each portion! Alternatively drizzle caramel sauce over warm servings if desired—it adds delightful richness enhancing overall dessert experience!
Can I substitute gluten-free flour in this recipe?
Certainly! Substitute regular flour with gluten-free options like almond flour or rice flour without compromising flavor greatly—just ensure toppings have proper texture by adjusting ratios slightly depending on choice made!
Summary
Making perfect apple crisp involves selecting appropriate ingredients while avoiding common mistakes like using unsuitable apple types or neglecting key steps such as cooling time after baking. Follow essential tips about ingredient ratios and preparation methods closely—take care not only when mixing but also during cooking times too! Enjoy serving warm alongside ice cream for an unforgettable dessert experience that everyone will appreciate!
Print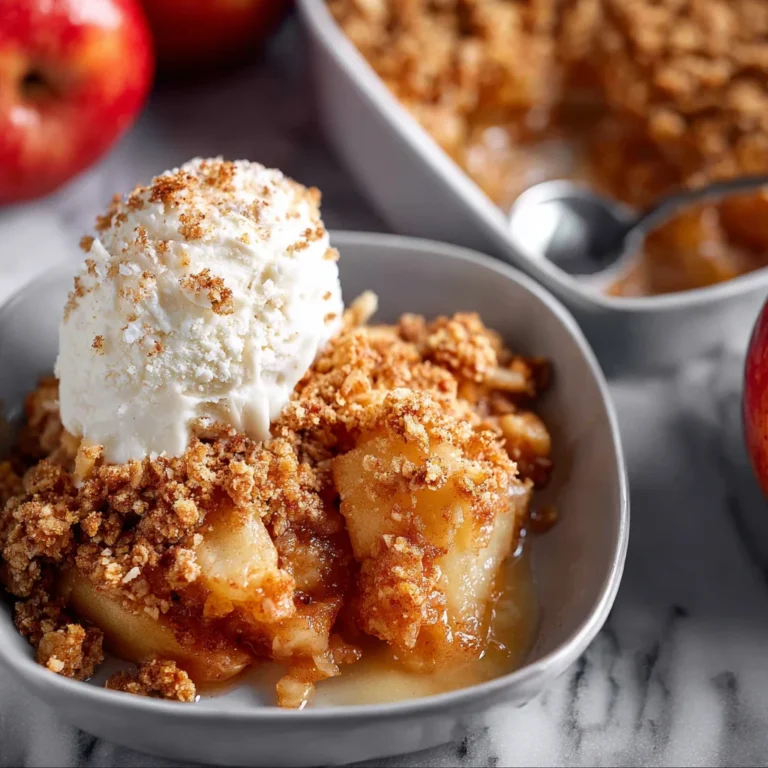
How to Make the Perfect Apple Crisp: A Step-by-Step Guide
This delicious apple crisp features tender, sweet apples topped with a crunchy oat topping. It’s the perfect dessert for any occasion!
- Total Time: 50 minutes
- Yield: 8 servings 1x
Ingredients
6 cups of peeled and sliced apples (such as Granny Smith or Honeycrisp)
1 cup of brown sugar
1 cup of rolled oats
3/4 cup of all-purpose flour
1 teaspoon of cinnamon
1/2 teaspoon of nutmeg
1/2 cup of unsalted butter (melted)
Pinch of salt
Instructions
1. Preheat the oven to 350°F (175°C).
2. In a large bowl, combine the sliced apples with 1/2 cup of brown sugar, cinnamon, nutmeg, and a pinch of salt. Mix well and pour into a greased 9×13 inch baking dish.
3. In another bowl, mix together the rolled oats, remaining brown sugar, flour, and melted butter until crumbly.
4. Sprinkle the oat mixture evenly over the apples in the baking dish.
5. Bake for 30-35 minutes or until the topping is golden brown and the apples are bubbly.
6. Let cool slightly before serving.
Notes
This apple crisp is best served warm with a scoop of vanilla ice cream on top!
- Prep Time: 15 minutes
- Cook Time: 35 minutes
Nutrition
- Serving Size: 1 serving
- Calories: 250
- Sugar: 20g
- Fat: 10g
- Carbohydrates: 40g
- Protein: 3g
Keywords: apple crisp, dessert, baking, fall recipes