There’s something undeniably enchanting about a Classic Red Velvet Cake that makes it a showstopper for any occasion. With its rich, crimson layers and velvety cream cheese frosting, this dessert captivates both the eyes and the taste buds. Whether you’re celebrating a birthday, anniversary, or simply indulging in a sweet treat, the vibrant hues of red velvet evoke feelings of joy and festivity.
While the traditional recipe is already a triumph, you can elevate the experience by experimenting with variations. Consider infusing the cake with hints of orange zest or swapping the cream cheese frosting for a luscious chocolate ganache—endless possibilities await you!
For those ready to tackle the baking adventure, triple sifting your dry ingredients ensures an exceptionally light and fluffy texture. And remember, the key to achieving that signature red color lies in the right chemical balance of cocoa powder and vinegar. Join me as we dive into the world of Red Velvet Cake and unlock the secrets to creating this timeless classic in your own kitchen!
Ingredients for Classic Red Velvet Cake:
Cake Ingredients:
- 2 ½ cups all-purpose flour
- 1 ½ cups granulated sugar
- 1 teaspoon baking soda
- 1 teaspoon salt
- 1 teaspoon unsweetened cocoa powder
- 1 ½ cups vegetable oil
- 1 cup buttermilk, at room temperature
- 2 large eggs, at room temperature
- 2 tablespoons red food coloring (preferably liquid)
- 1 teaspoon vanilla extract
- 1 teaspoon white vinegar
Frosting Ingredients:
- 1 cup unsalted butter, softened
- 4 cups powdered sugar, sifted
- 1 teaspoon vanilla extract
- 2 tablespoons heavy cream or milk (more if needed for consistency)
Optional Variations:
- Chocolate Variation: For a chocolate-kissed flavor, increase the cocoa powder in the cake ingredients to 2 tablespoons.
- Cream Cheese Frosting: Substitute half of the unsalted butter with 8 oz of cream cheese for a tangy flavor in the frosting.
- Spice Variation: Add a teaspoon of ground cinnamon or nutmeg to the dry ingredients for a warm spice profile.
- Nutty Twist: Incorporate ½ cup of chopped walnuts or pecans into the batter for added texture and flavor.
- Layered Delight: Divide the batter into three equal portions and bake them in round cake pans for a stunning layered version.
Serving Suggestions:
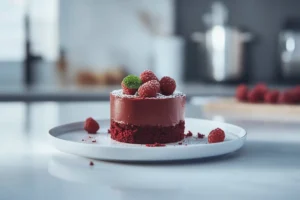
- For an extra touch, garnish each slice of red velvet cake with fresh berries or mint leaves.
- Pair with a scoop of vanilla ice cream to elevate the dessert experience.

How to prepare Classic Red Velvet Cake:
Step 1: Gather Your Ingredients
Before you start baking, collect all your ingredients. You’ll need flour, cocoa powder, sugar, baking soda, salt, oil, buttermilk, eggs, vanilla extract, and red food coloring.
Step 2: Preheat the Oven
Preheat your oven to 350°F (175°C). This ensures it reaches the right temperature for baking your cake correctly.
Step 3: Prepare the Cake Pans
Grease and flour two 9-inch round cake pans. This prevents the cake from sticking and makes for easy removal.
Mixing the Dry Ingredients
Step 4: Combine Dry Ingredients
In a large mixing bowl, sift together 2 ½ cups of all-purpose flour, 1 tablespoon of cocoa powder, 1 teaspoon of baking soda, and 1 teaspoon of salt. Set this mixture aside.
Creating the Wet Ingredients Mixture
Step 5: Mix the Wet Ingredients
In another bowl, combine 1 ½ cups of vegetable oil, 1 ½ cups of granulated sugar, 1 cup of buttermilk, 2 large eggs, and 1 teaspoon of vanilla extract. Whisk these ingredients until smooth.
Step 6: Add the Food Coloring
Stir in 2 tablespoons of red food coloring into your wet ingredients mixture. This will give your cake that signature color.
Combining Wet and Dry Ingredients
Step 7: Mix the Batter
Gradually add the dry ingredients to the wet ingredients. Mix until just combined; do not overmix to ensure the cake stays fluffy.
Step 8: Pour the Batter
Evenly pour the batter into the prepared cake pans and smooth the tops with a spatula.
Baking the Cake
Step 9: Bake the Cakes
Place the pans in the preheated oven. Bake for about 25-30 minutes, or until a toothpick inserted into the center comes out clean.
Step 10: Cool the Cakes
Remove the cakes from the oven and let them cool in the pans for 10 minutes. Then turn them out onto a wire rack to cool completely.
Step 11: Frosting
Once the cakes are completely cool, you can frost them with your favorite cream cheese frosting to complete your Classic Red Velvet Cake.
Tips for the Perfect Classic Red Velvet Cake
Maintain the Correct Temperature
To achieve the ideal texture and flavor for your red velvet cake, start by ensuring all ingredients are at room temperature. Eggs, butter, and buttermilk blend more easily when they are warm. About 30 minutes before you start baking, take these items out of the refrigerator. This simple step prevents the batter from curdling and helps create a smoother consistency.
Use Quality Ingredients
Quality matters in baking. Opt for pure cocoa powder rather than Dutch-processed cocoa for that authentic red velvet flavor. Look for neutral oils, like vegetable or canola oil, which help keep the cake moist without altering its taste. Using fresh, high-quality vanilla extract also enhances the overall flavor profile. When it comes to food coloring, choose gel coloring for consistent results and a vibrant red hue.
Make Suitable Substitutions
If you’re baking for someone with dietary restrictions, there are many substitutions you can make without compromising taste. For a gluten-free version, replace all-purpose flour with a gluten-free all-purpose blend. When making a dairy-free cake, use almond milk or coconut milk in place of buttermilk, adding a teaspoon of vinegar to achieve the right acidity. To substitute eggs, use flaxseed meal or applesauce; one egg can be replaced by mixing 1 tablespoon of flaxseed meal with 2.5 tablespoons of water.
Frosting and Decoration Suggestions
Cream cheese frosting is traditional, but experimenting can elevate your cake further. For a lighter option, consider whipped cream cheese or mascarpone. If you prefer a chocolate twist, add cocoa to the frosting. For decoration, sprinkle with crushed nuts or decorate with fresh berries for a colorful presentation.
Tips on Baking and Storage
Don’t overmix your batter, as this can result in a tough cake. Mix until just combined for the best texture. Once baked, let the cakes cool in the pan for 10 minutes, then transfer them to wire racks. For storage, keep the cake covered at room temperature for a couple of days. Refrigerating it can prolong freshness, but take it out about 30 minutes before serving for optimal taste and texture.
By following these tips and variations, your red velvet creation will delight anyone who tastes it.
Storage Tips for Classic Red Velvet Cake:
To keep your red velvet cake fresh and delicious, follow these effective storage tips. Proper storage not only maintains flavor but also helps preserve texture.
Optimal Storage Conditions
Store your cake in a cool, dry place. Avoid exposing it to direct sunlight or heat sources that could dry it out. If you plan to consume the cake within a few days, keeping it at room temperature works well. Make sure it stays in an airtight container to prevent it from absorbing any unwanted odors from the environment.
Refrigeration Tips
If you need to extend the cake’s freshness, refrigeration is an excellent option. Wrap the cake tightly in plastic wrap or aluminum foil. This wrapping helps seal in moisture and flavor while preventing the cake from drying out or picking up other smells from the fridge.
A whole cake can last in the refrigerator for up to a week. If you have leftover slices, it’s important to store them properly. Place individual slices in airtight containers or wrap them well to keep them fresh. Enjoying the cake within three to four days offers the best quality and taste.
Freezing for Longevity
Freezing is the ideal way to prolong the life of your cake. You can freeze both whole cakes and individual slices. Before freezing, ensure the cake is completely cooled. Wrap it tightly in plastic wrap or place it in a freezer-safe container. Label it with the date so you remember when you froze it.
A whole cake can last up to three months in the freezer. For sliced pieces, you can freeze them in individual portions for easy access. When you’re ready to enjoy it, simply transfer the cake to the refrigerator the night before to thaw. This slow thawing helps maintain its moisture and texture.
Serving Tips after Storage
Before serving any cake that has been refrigerated or frozen, allow it to come to room temperature. This process enhances flavor and improves the mouthfeel. Enjoy your red velvet cake at its best!
By following these storage tips, you can keep your red velvet cake fresh and flavorful while preventing waste. Happy baking!
Related Recipes to Complement Classic Red Velvet Cake
If you love the rich, velvety texture and unique flavor of classic red velvet cake, you might want to explore other delightful recipes that share similar qualities or harmony with it. Here are a few suggestions to enhance your dessert experience.
Chocolate Cream Cheese Brownies: These brownies offer a fudgy texture and a rich chocolate flavor. Like red velvet cake, they use cream cheese, which adds a creamy tang that complements chocolate’s sweetness. Serve them warm with a scoop of vanilla ice cream for a delicious pairing.
Carrot Cake with Cream Cheese Frosting: The moistness of carrot cake, alongside the tang of cream cheese frosting, makes it a close relative to red velvet cake. The warm spices like cinnamon and nutmeg in carrot cake provide a unique twist while still delivering that luscious bite you crave.
Lemon Layer Cake: For a refreshing contrast, consider a lemon layer cake. This cake’s bright, zesty flavors balance the rich and sweet notes of classic red velvet. The light, fluffy texture creates a delightful palate experience when served alongside.
Red Velvet Cupcakes: If you love individual servings, try red velvet cupcakes. They encapsulate the same flavors and colors as the cake but are more portable. They highlight the distinct taste and texture that fans adore while offering a fun, personal dessert option.
These recipes resonate with classic red velvet cake due to their shared ingredients or complementary flavors. They can elevate your dessert table with variety and interest, ensuring every sweet tooth leaves satisfied.
Frequently Asked Questions:
What is the origin of the Classic Red Velvet Cake?
The origins of the red velvet cake are somewhat debated, but it is believed to have emerged from the Southern United States in the early 20th century. The cake is distinguished by its vibrant red color, which was originally achieved with cocoa powder reacting with acidic ingredients like buttermilk and vinegar. During the ‘30s, a famous hotel in Toronto marketed it, further popularizing the striking dessert.
What makes a red velvet cake different from a chocolate cake?
While red velvet cake does contain cocoa powder, it is more of a flavor enhancer rather than the protagonist of the recipe. The cake’s unique texture and flavor come from its combination of buttermilk, vinegar, and oil, resulting in a moist crumb. In contrast, traditional chocolate cake typically has a richer chocolate flavor and is often denser in texture.
Can I use natural cocoa powder for red velvet cake?
Using natural cocoa powder is possible for making a red velvet cake, but it is essential to balance it with acidic ingredients. If you choose this option, ensure that you have enough buttermilk and vinegar to maintain the signature tanginess and achieve the desired texture. The choice between natural and Dutch-process cocoa can also affect the cake’s final flavor and color.
What frosting is best for red velvet cake?
Classic red velvet cake is traditionally paired with cream cheese frosting, which beautifully complements its flavor profile with a tangy sweetness. Some opt for buttercream frosting or a whipped cream frosting, but the cream cheese variation remains the most popular among bakers and cake lovers alike, bringing a rich and creamy balance to the dessert.
Can I make a gluten-free version of red velvet cake?
Absolutely! To create a gluten-free version of red velvet cake, simply substitute all-purpose flour with a gluten-free flour blend. Ensure that it includes xanthan gum or another binding agent to replicate the texture of traditional cake. This way, gluten-sensitive individuals can enjoy this delightful dessert without compromising taste or texture.
How should I store leftover red velvet cake?
To store leftover slices of the luscious red velvet cake, place them in an airtight container to maintain freshness. It’s best to refrigerate leftovers, especially if using cream cheese frosting, which should be kept chilled. When ready to enjoy again, allow the cake to come to room temperature for the best taste and texture.
Conclusion:
In summary, mastering the art of Classic Red Velvet Cake is both rewarding and surprisingly simple. This iconic dessert not only dazzles with its vibrant red hue and velvety texture but also offers flexibility in its ingredients and presentation. Whether you choose to enhance the flavor with a hint of cocoa or customize the frosting with cream cheese or buttercream, the options are endless. Don’t shy away from adding your personal touch, like incorporating nuts or different flavorings for a unique spin. Remember, the key to a perfect red velvet cake lies in the balance of moisture and flavor, so follow the recipe closely while allowing your creativity to shine. With these tips in mind, you’re well on your way to creating a delicious masterpiece that will surely impress any crowd.