
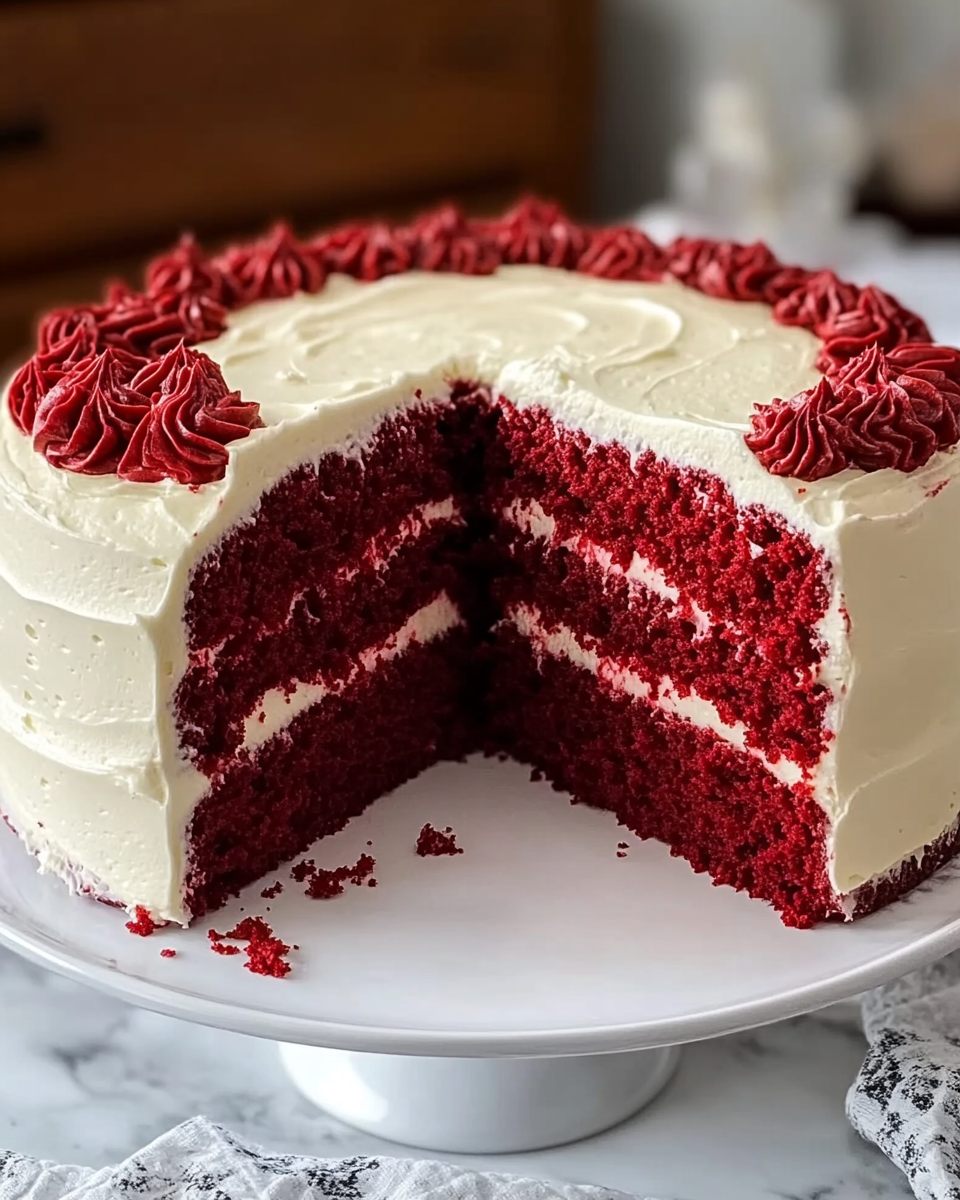
There’s something undeniably alluring about a Classic Red Velvet Cake. Its rich, vibrant hue not only makes it a feast for the eyes but also tantalizes your taste buds with a subtly sweet, cocoa-infused flavor and a velvety texture that melts in your mouth. Perfect for celebrations or a cozy afternoon treat, this iconic dessert is a true showstopper that never goes out of style.
Whether you stick to the traditional recipe or explore tempting variations—like adding cream cheese frosting, incorporating a hint of espresso, or even swapping in fruit for an unexpected twist—each version promises a unique spin on this beloved cake.
To elevate your baking game, consider key expert tips, such as using high-quality cocoa powder for a richer flavor and ensuring your ingredients are at room temperature for the best results. With a bit of practice and attention to detail, you’ll be on your way to mastering a Classic Red Velvet Cake that will impress family and friends alike!
Ingredients for Classic Red Velvet Cake:
This delightful cake recipe is perfect for special occasions and is sure to impress your guests. Below, you’ll find the precise measurements needed to create a luscious and moist red velvet cake that serves 8–10 people.
Cake Ingredients:
- 2 ½ cups all-purpose flour
- 1 ½ cups granulated sugar
- 1 teaspoon baking soda
- 1 teaspoon salt
- 1 teaspoon cocoa powder
- 1 ½ cups vegetable oil
- 1 cup buttermilk, at room temperature
- 2 large eggs, at room temperature
- 2 tablespoons red food coloring
- 1 teaspoon vanilla extract
- 1 teaspoon white vinegar
Frosting Ingredients:
- 1 cup unsalted butter, softened
- 4 cups powdered sugar, sifted
- 1 (8-ounce) package cream cheese, softened
- 1 teaspoon vanilla extract
- 1 tablespoon milk (or as needed for consistency)
Optional Variations and Alternative Ingredients:
- For a touch of flavor, consider adding 1 teaspoon almond extract to the frosting or the cake batter.
- Instead of buttermilk, you can use sour cream or Greek yogurt for a slightly different texture and taste.
- To create a chocolate twist, you may increase the cocoa powder in the cake batter to 2 tablespoons for a richer flavor.
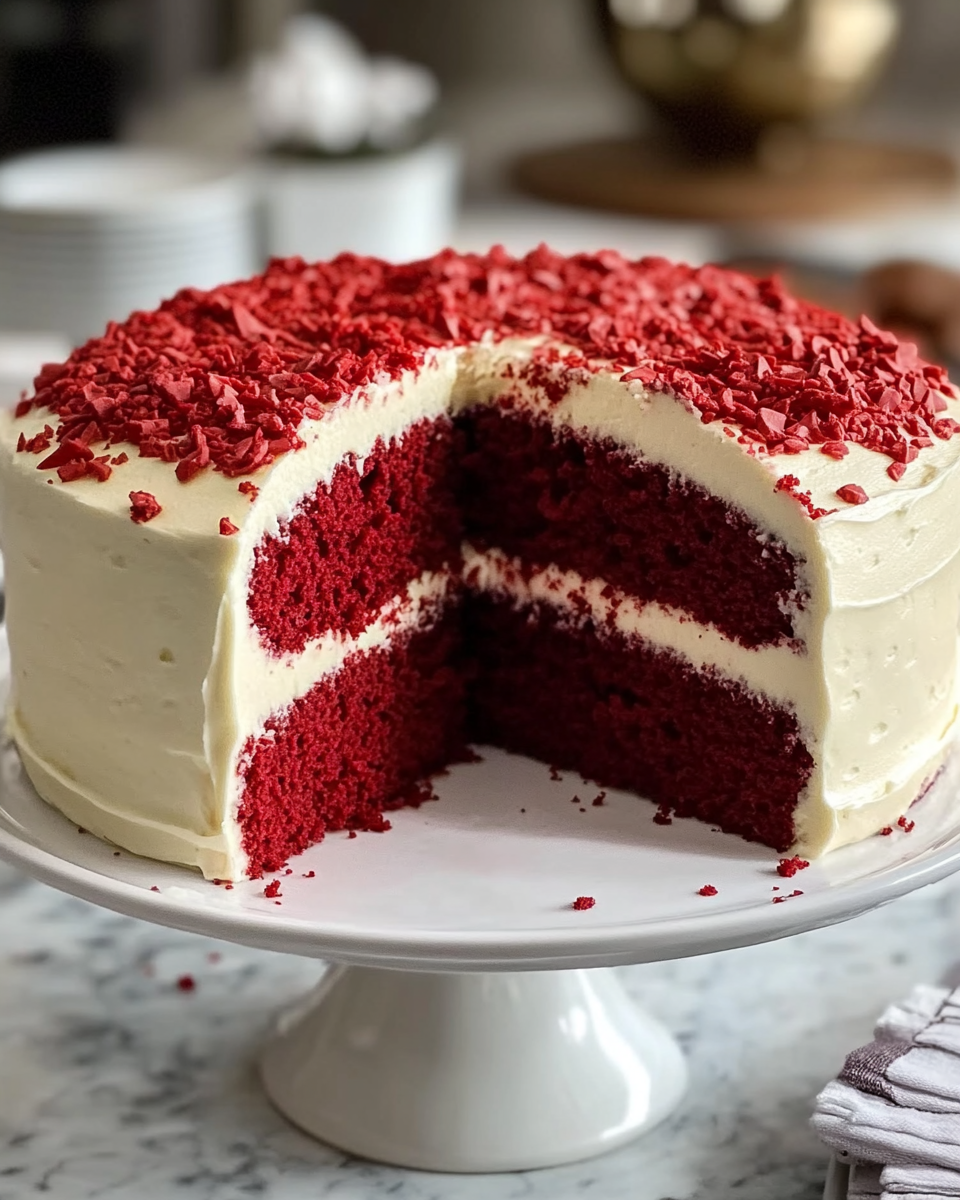
- For a festive touch, top your cake with chocolate shavings or red sprinkles.
- For a healthier option, substitute half of the all-purpose flour with whole wheat flour, though it may alter the texture slightly.
With these ingredients and optional variations, you’re well on your way to baking and decorating a stunning red velvet cake that everyone will love!
How to prepare Classic Red Velvet Cake:
Making a beautiful Classic Red Velvet Cake involves several organized steps. Here’s how you do it:
Ingredients Preparation
First, gather all the ingredients. You will need flour, cocoa powder, baking soda, baking powder, salt, sugar, vegetable oil, eggs, buttermilk, vanilla extract, red food coloring, and cream cheese for frosting.
Preheat your oven to 350°F (175°C). This ensures your oven is ready for the cake right when you finish your batter.
Mix the Dry Ingredients
In a large mixing bowl, whisk together 2 ½ cups of all-purpose flour, 1 tablespoon of cocoa powder, 1 teaspoon of baking soda, 1 teaspoon of baking powder, and ½ teaspoon of salt. Set aside to combine the flavors.
Combine Sugar and Oil
In another bowl, beat together 1 ½ cups of granulated sugar and 1 cup of vegetable oil until the mixture is smooth and well combined. This will form the base of your cake.
Add Eggs and Liquid Ingredients
Now, add 2 large eggs to the sugar and oil mix. Beat the mixture until the eggs are fully incorporated.
Next, stir in 1 cup of buttermilk and 1 teaspoon of vanilla extract. Mix gently until everything is well combined. You will want it to be smooth.
Incorporate Food Coloring
Add 1 tablespoon of red food coloring to the wet ingredients. Mix everything together thoroughly to achieve a vibrant red color throughout the batter.
Combine Wet and Dry Ingredients
Gradually add the dry ingredient mixture to the wet ingredients. Stir gently using a spatula until just combined. Do not overmix to keep the cake tender.
Prepare to Bake
Grease and flour two 9-inch round cake pans. Divide the cake batter evenly between the pans.
Bake the Cake
Bake in the preheated oven for 25 to 30 minutes or until a toothpick inserted in the center comes out clean. Let the cakes cool in the pans for 10 minutes.
Cooling and Frosting
After 10 minutes, turn the cakes out onto wire racks to cool completely. Once cooled, you can frost your cakes with cream cheese frosting.
Enjoy your delicious homemade cake!
Tips for the Perfect Classic Red Velvet Cake
Making a classic red velvet cake is an art that requires attention to detail and a few key tips to ensure success. Follow these practical guidelines for a delicious and visually appealing outcome.
Maintain the Correct Temperature
Temperature plays a crucial role in baking. Make sure your butter is at room temperature; this will ensure that it creams nicely with sugar for a light and fluffy texture. Similarly, eggs should also be at room temperature. If you forget to take them out in advance, you can quickly warm them up by placing them in a bowl of warm water for five to ten minutes.
Use Quality Ingredients
High-quality ingredients will significantly enhance the flavor and texture of your cake. Opt for pure vanilla extract instead of imitation for a richer taste. Use good-quality cocoa powder since chocolate flavor is key in this dessert. When choosing food coloring, prefer gel or liquid food colorings made specifically for baking, as they provide vibrant color without affecting the consistency.
Suitable Substitutions for Dietary Restrictions
For those with dietary restrictions, there are several effective substitutions you can make:
- Gluten-Free: Substitute all-purpose flour with a gluten-free flour blend. Ensure it contains xanthan gum, which helps bind the ingredients.
- Dairy-Free: Replace butter with coconut oil or a dairy-free margarine. Use almond milk or oat milk as a substitute for buttermilk, simply adding a tablespoon of vinegar or lemon juice to the milk to create a dairy-free buttermilk.
- Reduced Sugar: You can reduce the sugar by using natural sweeteners like maple syrup or honey. Remember to adjust the liquid content in your recipe accordingly.
Mixing Tips
When mixing your ingredients, be careful not to overmix. This can result in a dense cake instead of a light one. Mix just until the ingredients are combined and the batter is smooth. Use a rubber spatula to scrape down the sides of your bowl, ensuring everything gets incorporated.
Proper Baking Technique
Always preheat your oven before putting your cake in. This ensures even cooking. Use the toothpick test to check for doneness. The cake is ready when a toothpick inserted in the center comes out clean or with a few moist crumbs.
Following these tips will help you create an exquisite cake that is sure to impress at any gathering. Happy baking!
Storage Tips for Classic Red Velvet Cake:
Maintaining the freshness of your red velvet cake requires proper storage techniques. Whether you have leftover cake or plan to make it ahead of time, following these tips will help you enjoy your dessert for days to come.
Optimal Storage Conditions
First, allow your cake to cool completely before storing it. This prevents moisture buildup, which can lead to sogginess. Wrap the cake in plastic wrap or aluminum foil securely. You can also place it in an airtight container. Make sure to cover all exposed areas to keep air out.
If you’re storing an unsliced cake, it will maintain its freshness better than a sliced one. Keep the cake at room temperature, away from direct sunlight and heat sources. A pantry or cupboard works well. This type of storage can keep your cake fresh for about 2 to 3 days.
Refrigeration for Extended Freshness
If you need to store the cake for a longer period, consider refrigeration. Wrap it tightly in plastic wrap, then place it in an airtight container. The cooler temperature will prolong its shelf life up to a week. Remember, chilled cake may dry out faster than one stored at room temperature, so ensure it is well wrapped.
When you’re ready to serve the cake after refrigeration, allow it to come to room temperature. This step enhances the cake’s flavor and texture.
Freezing for Long-Term Storage
If you want to save your red velvet cake for an even longer time, freezing is an excellent option. Slice the cooled cake into portions before wrapping each piece. Use plastic wrap followed by aluminum foil for added protection against freezer burn. Alternatively, you can place the entire cake in a freezer-safe, airtight container.
A properly stored cake can last up to three months in the freezer. When ready to eat, thaw the cake in the refrigerator overnight. After thawing, let it sit at room temperature for about an hour before serving. This method preserves the cake’s taste and moisture.
Conclusion for Cake Freshness
By following these storage tips, you can enjoy your classic red velvet cake at its best. Proper wrapping, storing, and temperature control can extend its shelf life while preserving its delightful flavor.
Related Recipes to Classic Red Velvet Cake
If you love the rich flavors and vibrant color of red velvet cake, you might enjoy these related recipes. Each offers a unique twist while sharing similarities that make them delightful complements to your dessert table.
- Chocolate Cake: A classic choice, chocolate cake shares a moist texture and rich taste with red velvet. Both cakes often feature cream cheese frosting, allowing them to pair beautifully together. Serve a slice of chocolate cake alongside red velvet for a deliciously varied dessert experience.
- Carrot Cake: Just like red velvet, carrot cake is known for its moistness and uses spices that enhance the flavor. The cream cheese frosting traditionally used in carrot cake also mirrors the tangy sweetness found in the frosting of red velvet. This recipe offers a beautiful color contrast when plated together.
- Red Velvet Cupcakes: For a fun and portable version, consider red velvet cupcakes. They capture all the same flavors in a bite-sized form. You can frost them with the same cream cheese icing, making them a wonderful addition to a dessert platter that includes your classic cake.
- Strawberry Shortcake: This recipe introduces a light, fruity alternative that complements the richness of a classic red velvet cake. The fresh strawberries and whipped cream provide a refreshing contrast that balances the deeper flavors of red velvet, perfect for spring and summer gatherings.
- Vanilla Bean Cake: A vanilla bean cake offers a neutral palette that enhances the unique flavor profile of red velvet without overpowering it. The simplicity of vanilla pairs well with the decadent nature of red velvet, making them ideal companions for a layered cake presentation.
These recipes not only highlight complementary flavors but also provide variety for any occasion. Experiment with these desserts to elevate your gathering and impress your guests!
Frequently Asked Questions:
What is the origin of Red Velvet Cake?
Red Velvet Cake has a rich history, believed to have originated in the early 20th century, particularly in the southern United States. Some say it was created as a result of a chemical reaction between cocoa powder and acidic ingredients like buttermilk or vinegar. The cake gained huge popularity during the 1920s and 1930s, contributing to its classic status in American baking.
What makes Red Velvet Cake different from other chocolate cakes?
The defining characteristic of this gorgeous dessert is its vibrant red color, achieved through the combination of cocoa powder and the addition of red food coloring. Unlike standard chocolate cakes, the flavor of a traditional red velvet cake is more nuanced, thanks to its buttermilk base and unique tangy taste that balances the sweetness, creating a layered flavor profile.
Can I make a healthier version of Red Velvet Cake?
Absolutely! You can easily modify the recipe by substituting traditional ingredients with healthier alternatives. Using whole wheat flour for all-purpose flour, reducing the sugar content, or even switching to lighter oils can create a nourishing twist. Incorporating mashed fruits like bananas or pureed apples can also add sweetness while cutting down on calories.
What type of frosting pairs best with Red Velvet Cake?
The quintessential pairing for this luscious dish is cream cheese frosting. The creamy texture and tangy flavor of the frosting perfectly complement the subtle sweetness and velvety characteristics of the cake itself. Alternatively, buttercream frosting can be used for those who prefer a sweeter option, making it versatile for different taste preferences.
How can I store Red Velvet Cake to keep it fresh?
To maximize freshness, store your cake in an airtight container at room temperature for up to two days. For longer storage, you can refrigerate it, where it will last for about a week. If you need to freeze the cake, wrap it tightly in plastic wrap and then in aluminum foil to prevent freezer burn. It can be frozen for up to three months and thawed when ready to serve.
Is Red Velvet Cake gluten-free?
While traditional recipes for this beloved dessert are not gluten-free, you can effortlessly adapt it by using gluten-free flour blends. This modification will ensure everyone can enjoy the rich and delightful flavors while adhering to dietary restrictions without sacrificing taste or texture.
Conclusion:
Crafting a Classic Red Velvet Cake is both simple and rewarding, making it perfect for bakers of all skill levels. This timeless dessert combines the rich flavor of cocoa with a striking red color that always impresses. One of the key takeaways is the flexibility in customization; feel free to adjust the sweetness or add textured elements like nuts or chocolate chips to make it your own. Also, don’t be afraid to experiment with different frostings—from cream cheese to a more decadent chocolate ganache. This cake not only delights the taste buds but also offers a canvas for your creativity. Whether for a special occasion or a simple gathering, this delectable treat is sure to stand out, ensuring loved ones will return for seconds. Embrace the journey of baking and enjoy the delightful experience of sharing your Classic Red Velvet Cake!
Print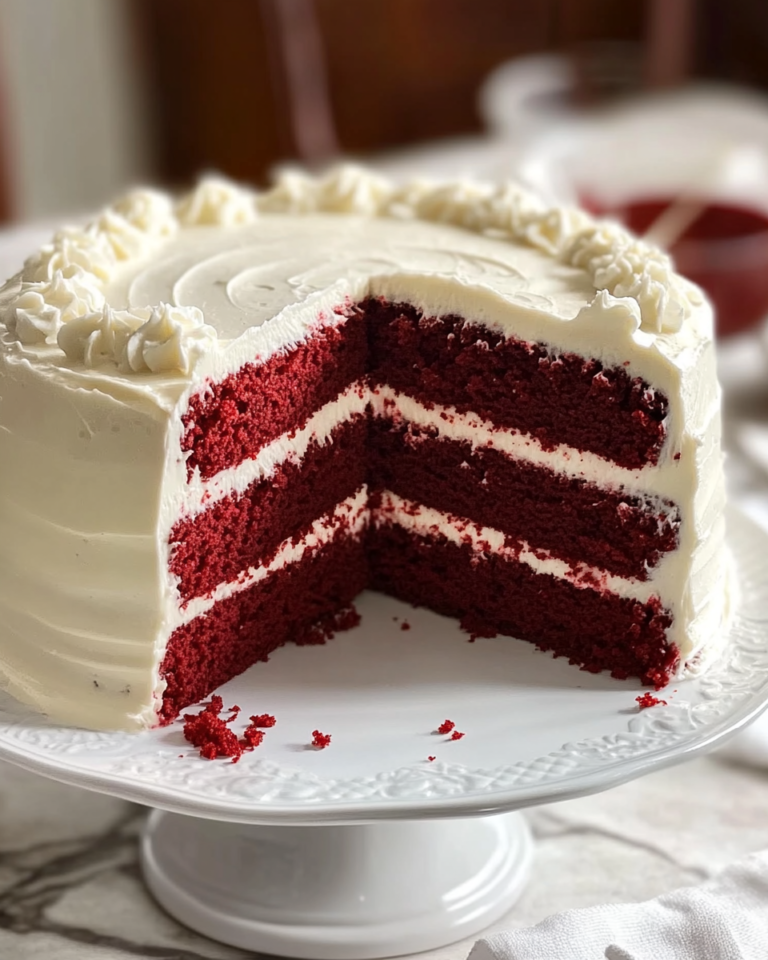
Classic Red Velvet Cake: A Timeless Dessert Delight
- Total Time: 50
Ingredients
– 2 1/2 cups all-purpose flour
– 1/2 cup unsalted butter, softened
– 1 cup buttermilk, room temperature
– 1 teaspoon baking soda
– 1 teaspoon baking powder
– 4 cups powdered sugar
– 2 tablespoons cocoa powder
– 1 teaspoon salt
– 1 teaspoon vanilla extract
– 2 large eggs
– 1 teaspoon white vinegar
– 1 1/2 cups granulated sugar
– 2 tablespoons red food coloring
– 8 oz cream cheese, softened
– 1 cup vegetable oil
Instructions
1. Preheat your oven to 350°F (175°C). Prepare two 9-inch round cake pans by greasing and lightly dusting them with flour.
2. In a large mixing bowl, whisk together the flour, sugar, baking soda, baking powder, cocoa powder, and salt until well combined.
3. In another bowl, blend the vegetable oil, buttermilk, eggs, red food coloring, vanilla extract, and vinegar. Ensure everything is mixed thoroughly.
4. Pour the wet ingredients into the dry mixture. Stir gently until just combined—don’t overmix; a few lumps are perfectly fine.
5. Evenly distribute the cake batter between the prepared pans, smoothing the tops with a spatula.
6. Bake in the preheated oven for 25-30 minutes. Test doneness by inserting a toothpick into the center of the cakes; it should come out clean.
7. Once baked, allow the cakes to cool in the pans for about 10 minutes before transferring them to a wire rack to cool completely.
8. For the cream cheese frosting, beat the softened butter and cream cheese together in a mixing bowl until the mixture is smooth and creamy.
9. Gradually add the powdered sugar to the mixing bowl, followed by the vanilla extract. Beat until the frosting is light, fluffy, and fully combined.
10. Once the cakes are completely cool, layer and frost them with your cream cheese frosting. Decorate the cake as desired for a beautiful finish.
Nutritional Information: A typical slice of this cake contains approximately 350 calories, 15g of fat, 45g of carbohydrates, and 3g of protein.
- Prep Time: 20
- Cook Time: 30