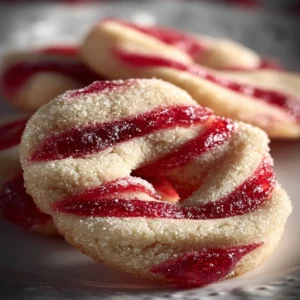
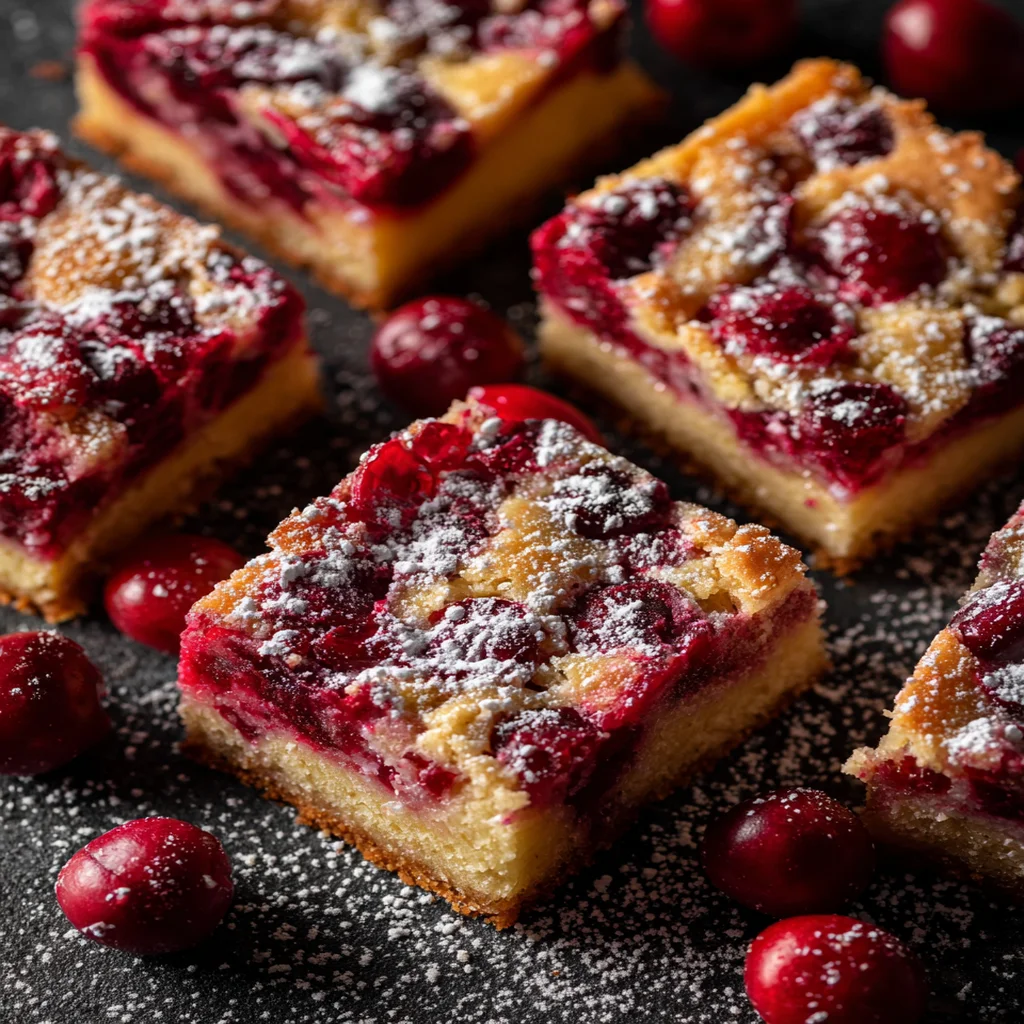
The holiday season calls for sweet treats that bring joy and warmth to gatherings. One such delightful option is Christmas Cherry Bars. These bars combine a rich buttery crust with a luscious cherry filling, making them an irresistible addition to your festive table. With a perfect balance of sweetness and tartness from the cherries, they are sure to impress your family and friends. Follow this recipe for an easy way to create this delightful dessert that captures the spirit of the season.
Ingredient Breakdown
Flour
For this recipe, you will need 2 cups of all-purpose flour. This forms the base of your crust and provides structure to the bars. Using all-purpose flour ensures that your bars have a tender yet sturdy texture.
Sugar
You will require 1 cup of granulated sugar in total: ¾ cup for the crust and ¼ cup for the filling. Sugar sweetens both the crust and filling while helping achieve a lovely golden color during baking.
Butter
Use ½ cup (1 stick) of unsalted butter at room temperature. The butter adds richness and flavor to both the crust and filling. Make sure it is softened for easier mixing into your dough.
Eggs
Two large eggs are needed for this recipe. Eggs act as binding agents in both the crust and filling, ensuring your bars hold together well after baking.
Cherries
You will need 2 cups of fresh or canned cherries (pitted). These provide the main flavor profile of your dessert. If using canned cherries, make sure to drain them well before use.
Baking Powder
Add 1 teaspoon of baking powder to help leaven your crust slightly. This ensures that the bars have a light texture rather than being too dense after baking.
Vanilla Extract
Use 1 teaspoon of pure vanilla extract to enhance flavor throughout the bars. Vanilla complements the cherries beautifully, adding depth to each bite.
Step By Step Recipe: Christmas Cherry Bars
Prepare Your Oven
Preheat your oven to 350°F (175°C). This step is crucial as it ensures even baking once you place your bars in the oven. A properly preheated oven helps achieve that golden-brown color on top.
Make The Crust Mixture
In a large mixing bowl, combine 2 cups of flour with ¾ cup of granulated sugar and ½ cup of softened butter. Mix these ingredients until crumbly. You can use a pastry cutter or fork for this task until it resembles coarse crumbs.
Add The Eggs And Baking Powder
Next, add two large eggs and 1 teaspoon of baking powder into your crumbly mixture. Stir gently until combined but do not overmix; you want small lumps for added texture in your crust.
Press The Crust Into A Pan
Lightly grease a 9×13-inch baking dish with butter or cooking spray. Press about two-thirds of the dough mixture evenly into the bottom of the prepared pan using your fingers or a spatula.
Prepare The Cherry Filling
In another bowl, mix together 2 cups of pitted cherries with ¼ cup sugar and 1 teaspoon vanilla extract until well combined. This mixture should be juicy yet not overly runny—adjust sugar based on cherry sweetness if necessary.
Layer The Cherry Mixture
Spread the cherry filling over the pressed crust layer in an even manner using a spatula or spoon. Ensure that every part gets some cherry goodness so each bite is flavorful.
Crumble The Remaining Dough
Take the remaining one-third of dough mixture and crumble it over the top of your cherry layer evenly. This creates a nice texture contrast between layers once baked while allowing some cherries to peek through.
Bake The Bars
Place your assembled dish in the preheated oven and bake for about 30-35 minutes or until golden brown on top. Keep an eye on them towards the end—the delicious aroma will let you know when they’re close!
Cool Before Cutting
Once baked, remove from oven and allow cooling in pan on wire rack for at least an hour before cutting into squares or rectangles for serving. This cooling time allows everything to set properly without falling apart during slicing.
Serving and Storing Tips
Serve At Room Temperature
These Christmas Cherry Bars are best served at room temperature after cooling completely in their pan. This allows flavors to meld beautifully while making them easier to cut into neat squares without crumbling apart.
Store In An Airtight Container
To keep leftovers fresh longer, store any uneaten bars in an airtight container at room temperature for up to three days or in the refrigerator for up to one week; just ensure they are fully cooled before sealing away!
Freeze For Later Enjoyment
If you want to prepare ahead of time or save some delights for later enjoyment, freeze individual squares wrapped tightly in plastic wrap followed by aluminum foil; they can be stored this way for up to three months!
Now you have all you need to make mouthwatering Christmas Cherry Bars! Enjoy these treats during festive gatherings or as cozy snacks throughout wintertime!
Mistakes to avoid
One common mistake when making Christmas Cherry Bars is using too much flour. Adding excess flour can lead to a dry texture, making your bars less enjoyable. Always use the precise measurement and level off the flour in your measuring cup for accuracy.
Another mistake is neglecting to let the cherries drain properly. If you use canned cherries without draining them, excess moisture can ruin the consistency of your bars. Make sure to drain and pat them dry before adding them to your batter.
Overbaking is another pitfall many face. It’s essential to monitor the baking time closely. Even a few minutes too long can result in hard, crumbly bars instead of the soft, chewy texture you desire. Keep an eye on them towards the end of the baking time.
Not cooling adequately before slicing is a frequent error. Allow your Christmas Cherry Bars to cool completely in the pan before cutting into them. This helps maintain their shape and prevents them from crumbling apart when served.
Lastly, skipping the topping can be a mistake that impacts flavor and presentation. A dusting of powdered sugar or a drizzle of icing enhances both taste and visual appeal, making your Christmas Cherry Bars more festive and inviting.

Tips and tricks
To achieve perfect Christmas Cherry Bars, consider using fresh cherries if they are in season. Fresh cherries can provide a vibrant flavor that canned ones may lack. If using frozen cherries, ensure they are thawed completely and drained well to prevent excess moisture in your batter.
When mixing your ingredients, it’s helpful to cream the butter and sugar well until fluffy before adding eggs. This process incorporates air into your mixture, leading to lighter bars with a tender crumb. Take your time during this step for optimal results.
Experiment with adding almond extract alongside vanilla for extra depth in flavor. The combination complements the cherries beautifully and gives your bars a warm holiday aroma that fills your kitchen as they bake.
For added texture, consider mixing in chopped nuts such as walnuts or pecans into your batter. Nuts provide a delightful crunch that contrasts nicely with the soft cherry filling while also enhancing nutritional value.
Lastly, once baked, allow your Christmas Cherry Bars to rest at room temperature for a few hours before serving them. This resting period helps flavors meld together and allows for easier slicing without falling apart. You will appreciate how this small step makes a significant difference in presentation.
Suggestions for Christmas Cherry Bars
For an even more festive touch, consider topping your Christmas Cherry Bars with a simple cream cheese frosting. This addition not only enhances flavor but also provides a beautiful contrast against the vibrant red cherries, making them visually appealing for holiday gatherings.
You might also try incorporating different fruits or berries into your recipe for variety. Mixing in blueberries or raspberries can create unique flavor combinations while still keeping that delicious cherry essence intact. This approach adds color and excitement to every bite.
If you’re looking for an easy way to serve these bars at holiday parties, cut them into small squares or triangles and place them on decorative platters. This presentation makes it easy for guests to grab one while mingling without creating messes or fuss.
Consider pairing these bars with hot beverages like spiced cider or peppermint tea during holiday festivities. The flavors complement each other well and make for a cozy dessert experience that everyone will enjoy.
Finally, experiment with different types of chocolate drizzles over the top of your bars after they have cooled down completely. Dark chocolate pairs wonderfully with cherries and adds an indulgent touch that elevates these treats beyond standard fare.
FAQs
What ingredients do I need for Christmas Cherry Bars?
To make delicious Christmas Cherry Bars, you will need basic baking ingredients including flour, sugar, butter, eggs, baking powder, vanilla extract, and fresh or canned cherries (drained). Additionally, you might opt for optional ingredients like almond extract or chopped nuts if desired for added flavor and texture.
Can I substitute fresh cherries with frozen ones?
Yes! Frozen cherries work perfectly fine in this recipe; however, it’s crucial to thaw them fully first and drain any excess liquid before use. This step prevents soggy bars by ensuring that extra moisture doesn’t affect the final texture of your Christmas Cherry Bars.
How long do Christmas Cherry Bars last?
When stored properly in an airtight container at room temperature, Christmas Cherry Bars can last up to five days. If you’d like them to keep longer than that, consider refrigerating them where they can last up to two weeks while retaining their delightful taste.
Can I freeze my Christmas Cherry Bars?
Absolutely! These bars freeze very well when wrapped tightly in plastic wrap or stored in an airtight container suitable for freezing. They can stay frozen for up to three months; simply thaw them overnight in the refrigerator before serving again.
What should I serve with my Christmas Cherry Bars?
Pairing these delightful cherry bars with whipped cream or vanilla ice cream creates a delicious dessert experience perfect for holiday gatherings! Alternatively, serving them alongside hot beverages like cocoa or spiced cider enhances their festive appeal as well.
How do I know when my Christmas Cherry Bars are done baking?
To check if your bars are done baking, insert a toothpick into the center; it should come out clean or with just a few moist crumbs attached—indicating doneness without being overly baked! Also look for edges turning golden brown as another sign of readiness during cooking time.
Summary
In summary, crafting delicious Christmas Cherry Bars involves avoiding common mistakes such as overbaking or using excess flour while incorporating helpful tips like using fresh ingredients and allowing adequate cooling time post-baking. Suggestions like adding toppings enhance both flavor and presentation at holiday events while thoughtful pairings elevate enjoyment further! By following these guidelines closely along with addressing frequently asked questions around preparation techniques ensures success every time you bake this festive treat!
Print
Christmas Cherry Bars
Deliciously festive cherry bars perfect for your holiday gatherings. These sweet and tangy treats are sure to be a hit!
- Total Time: 59 minute
- Yield: 16 servings 1x
Ingredients
1 cup all-purpose flour
1/2 cup granulated sugar
1/4 cup unsalted butter, softened
2 large eggs
1 teaspoon vanilla extract
1/2 teaspoon baking powder
1/4 teaspoon salt
1 cup cherry pie filling
Powdered sugar for dusting (optional)
Instructions
1. Preheat the oven to 350°F (175°C) and grease an 8×8 inch baking dish.
2. In a mixing bowl, cream together the softened butter and granulated sugar until light and fluffy.
3. Beat in the eggs one at a time, then stir in the vanilla extract.
4. In another bowl, whisk together the flour, baking powder, and salt.
5. Gradually add the dry ingredients to the wet mixture, mixing until just combined.
6. Spread half of the batter into the prepared baking dish.
7. Spoon the cherry pie filling over the batter evenly.
8. Drop spoonfuls of the remaining batter over the cherry filling, spreading it as best you can.
9. Bake in preheated oven for 25-30 minutes or until golden brown and a toothpick inserted comes out clean.
10. Allow to cool completely before cutting into bars and dusting with powdered sugar if desired.
Notes
This recipe can be easily doubled for a larger crowd. Feel free to substitute other fruit fillings according to your preference!
- Prep Time: 10 minutes
- Cook Time: 25-30 minutes
Nutrition
- Serving Size: 1 bar
- Calories: 150
- Sugar: 12g
- Fat: 6g
- Carbohydrates: 20g
- Protein: 2g
Keywords: Christmas, cherry bars, dessert, holiday baking